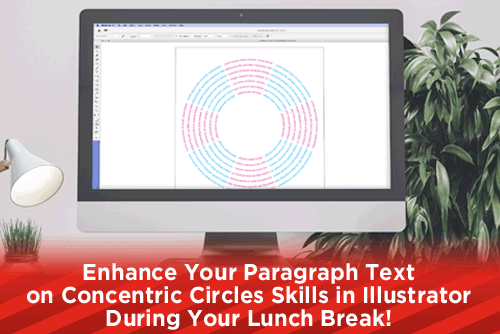
I recently saw a question posted to a Facebook group asking how to create paragraph text on concentric circles in Illustrator. A few of the replies said you could do this with the warp tool, but the results were not the same. I was worried that after using the warp tool you would not be able to adjust the text, but if you choose Object > Envelope Distort > Edit Contents, you can edit the text that has been warped. For my test file, the copy looked normal at the bottom and stretched at the top. Playing around with the shape and type size as well as the leading helped a little but there was no control over the results.
Drawing Concentric Circles
In Illustrator, begin with two circles drawn to the inner and outer dimensions of your artwork (A Drawing Circles). Next, determine how many rows of text you want between the two circles. In my example, I will have seven rows of text between the inner and outer circles.
With the two circles selected, make a blend of the two circles by choosing Object > Blend > Make (or you can use the blend tool and select the two objects you want to blend). This will add a circle between the two circles selected. To add more circles, with the blend still selected, choose Object > Blend > Blend Options (or double-click the blend tool while the objects are selected). In the Properties Panel, choose Specified Steps, and enter the number of circles you are wanting (I chose five for my example), you can also click the preview button to make sure the spacing is what you are looking for (B. Blending Circles into Many Circles).
In order to separate the circles you have created using the blend tool, choose Object > Expand deselect the Fill and Stroke check boxes leaving only the Object box selected. You should see handles on all of the circles now. Choose Object > Ungroup in order to be able to select each circle.
Options
In my example, I am wanting to create eight pie slices for my text. To get the circles cut out to the pie slices, I created angled lines over the circles. Taking the two lines for the edges of the pie slice, I created a closed shape for each, then using the unite pathfinder tool, join the two shapes into one (C. Create a shape to remove unwanted lines). Copy the shape to the clipboard, then select a circle and use the subtract pathfinder tool to delete the circle from under the top shape. Paste the copied graphics in front using Command F, select another circle and subtract. Repeat for each circle until they are all in a wedge shape (D. Remove Shapes). Click the Direct Selection Tool and drag over the bottom point of each wedge then delete (E. Pie Wedge Shapes). You should now see seven arched concentric lines (F. Concentric Arcs). Now you are ready to add text to each line.
Adding Text to the Circles
Beginning with the outer circle selected, click and hold down the mouse key on the Type Tool. Select Type On Path from the slideout menu. Use the cursor to click on the left side of the outer circle. The newer Illustrator will create filler text with Lorem Ipsum type. If you have an older version of Illustrator, you can enter some filler text, or leave it blank for now. Notice that the text is upside down (G. Adding Text). In order to have the text right reading, you can do this manually by clicking the Selection tool and select the circle. You will see three vertical lines on the path of the text, one each at the ends and one in the center. Move the cursor over the center vertical line until you see an up arrow appear next to the cursor. Now you can click that line and drag it straight up, causing the text to be right reading. Alternatively, you can select the left and right vertical lines to adjust the left and right margin of your text. An easier way to make the text right reading is with the lines selected, choose Type > Type On A Path > Type Options and check the Flip box, then click ok. Now your text should be correct.
An easy way to flow text to the next lines is to create a large paragraph box and let Illustrator auto fill with Ipsum Lorem text or type a paragraph of copy into the box. Select all of the text in the paragraph box and copy to your clipboard. Go back to the type on the arc, select all of the text there and paste the copied text. At the end of the line, you should see a red box with the plus symbol inside of it. Clicking the plus symbol turns your cursor into a half box with lines showing overflow text. Now click the beginning of the next line where you want the text to flow. Again, the text will be upside down but leave it alone for now. Click the red box with the plus symbol at the end of the new line and continue with these steps until all of the lines have text in them. Click your selection tool, when you hover over the center horizontal line, your cursor will change to include an up arrow, click the center horizontal line on an upside down text line and pull up. Repeat for each line that has upside down text. All of your text should now be arched and right reading (H. Linking Paragraph Text).
If you want to make a full circle of the pie slices (I. Cirlce of Paragraph Text), copy all of the arched text with the selection tool, and paste into place. Rotate 45˚ and move to position. Repeat paste and rotate until you have four slices around a circle (you can draw a circle to help guide where the slices should be). Select all of the slices, copy and paste, rotate 45˚ to the correct position.

A Few Pointers
It would be nice if Illustrator had a way to create an arched paragraph based on a circle, but I have not seen anything available so far. An advantage of having an arched paragraph would be that you could control the leading between the lines of type. With the example I have provided, if you wanted less space between the lines, you would have to recreate the circles again and go back through the steps above.
Selecting the pie slice and increasing the text size will increase each line, the same thing if you want to color the text in the slice.
If you want to indent the left and right margins, you can use the paragraph menu and enter numbers in the Left and Right Indent areas. You can also adjust the left and right margins of individual lines by clicking on the slice with the selection tool and hovering over the left or right horizontal line and drag left or right.
I hope this tutorial helps anyone looking for an answer on how to create arched text on concentric circles. If you have any suggestions or helpful tips, please let me know by contacting getsocial@myprintsouth.com.
JOIN US!
Click here to subscribe to our mailing list if you would you like receive more helpful print related articles in your inbox every week.

